

.webp)
Learn how to participate through the desktop and mobile version
Welcome to Maya's Fair Launch! We have prepared this article to guide you through our Liquidity Auction process with clearness and simplicity. Here, we aim to answer all of your "how to…?" questions since we have already answered the "what is…?" type of questions here.If you are familiar with the process already or have read our past articles before, just remember the highlights of the Liquidity Auction:

At a high level, adding liquidity into Maya simply involves sending tokens into one of the protocol's addresses with a "memo" —a special annotation on their respective chains— that identifies their user intent. This is, by the way, how all interactions with Maya occur. Users send transactions and indicate with a memo whether they want to make a swap, deposit, bond, etc.
Having said that, Maya's addresses can be abruptly replaced or discarded — for example, during churning rounds — and sending funds to an old address can result in a permanent loss. We recommend participating in the Liquidity Auction through the ThorWallet web interface or mobile application for ease of use. User interfaces are designed to simplify our lives, and THORWallets’ will automatically handle any necessary memos or address changes for us.
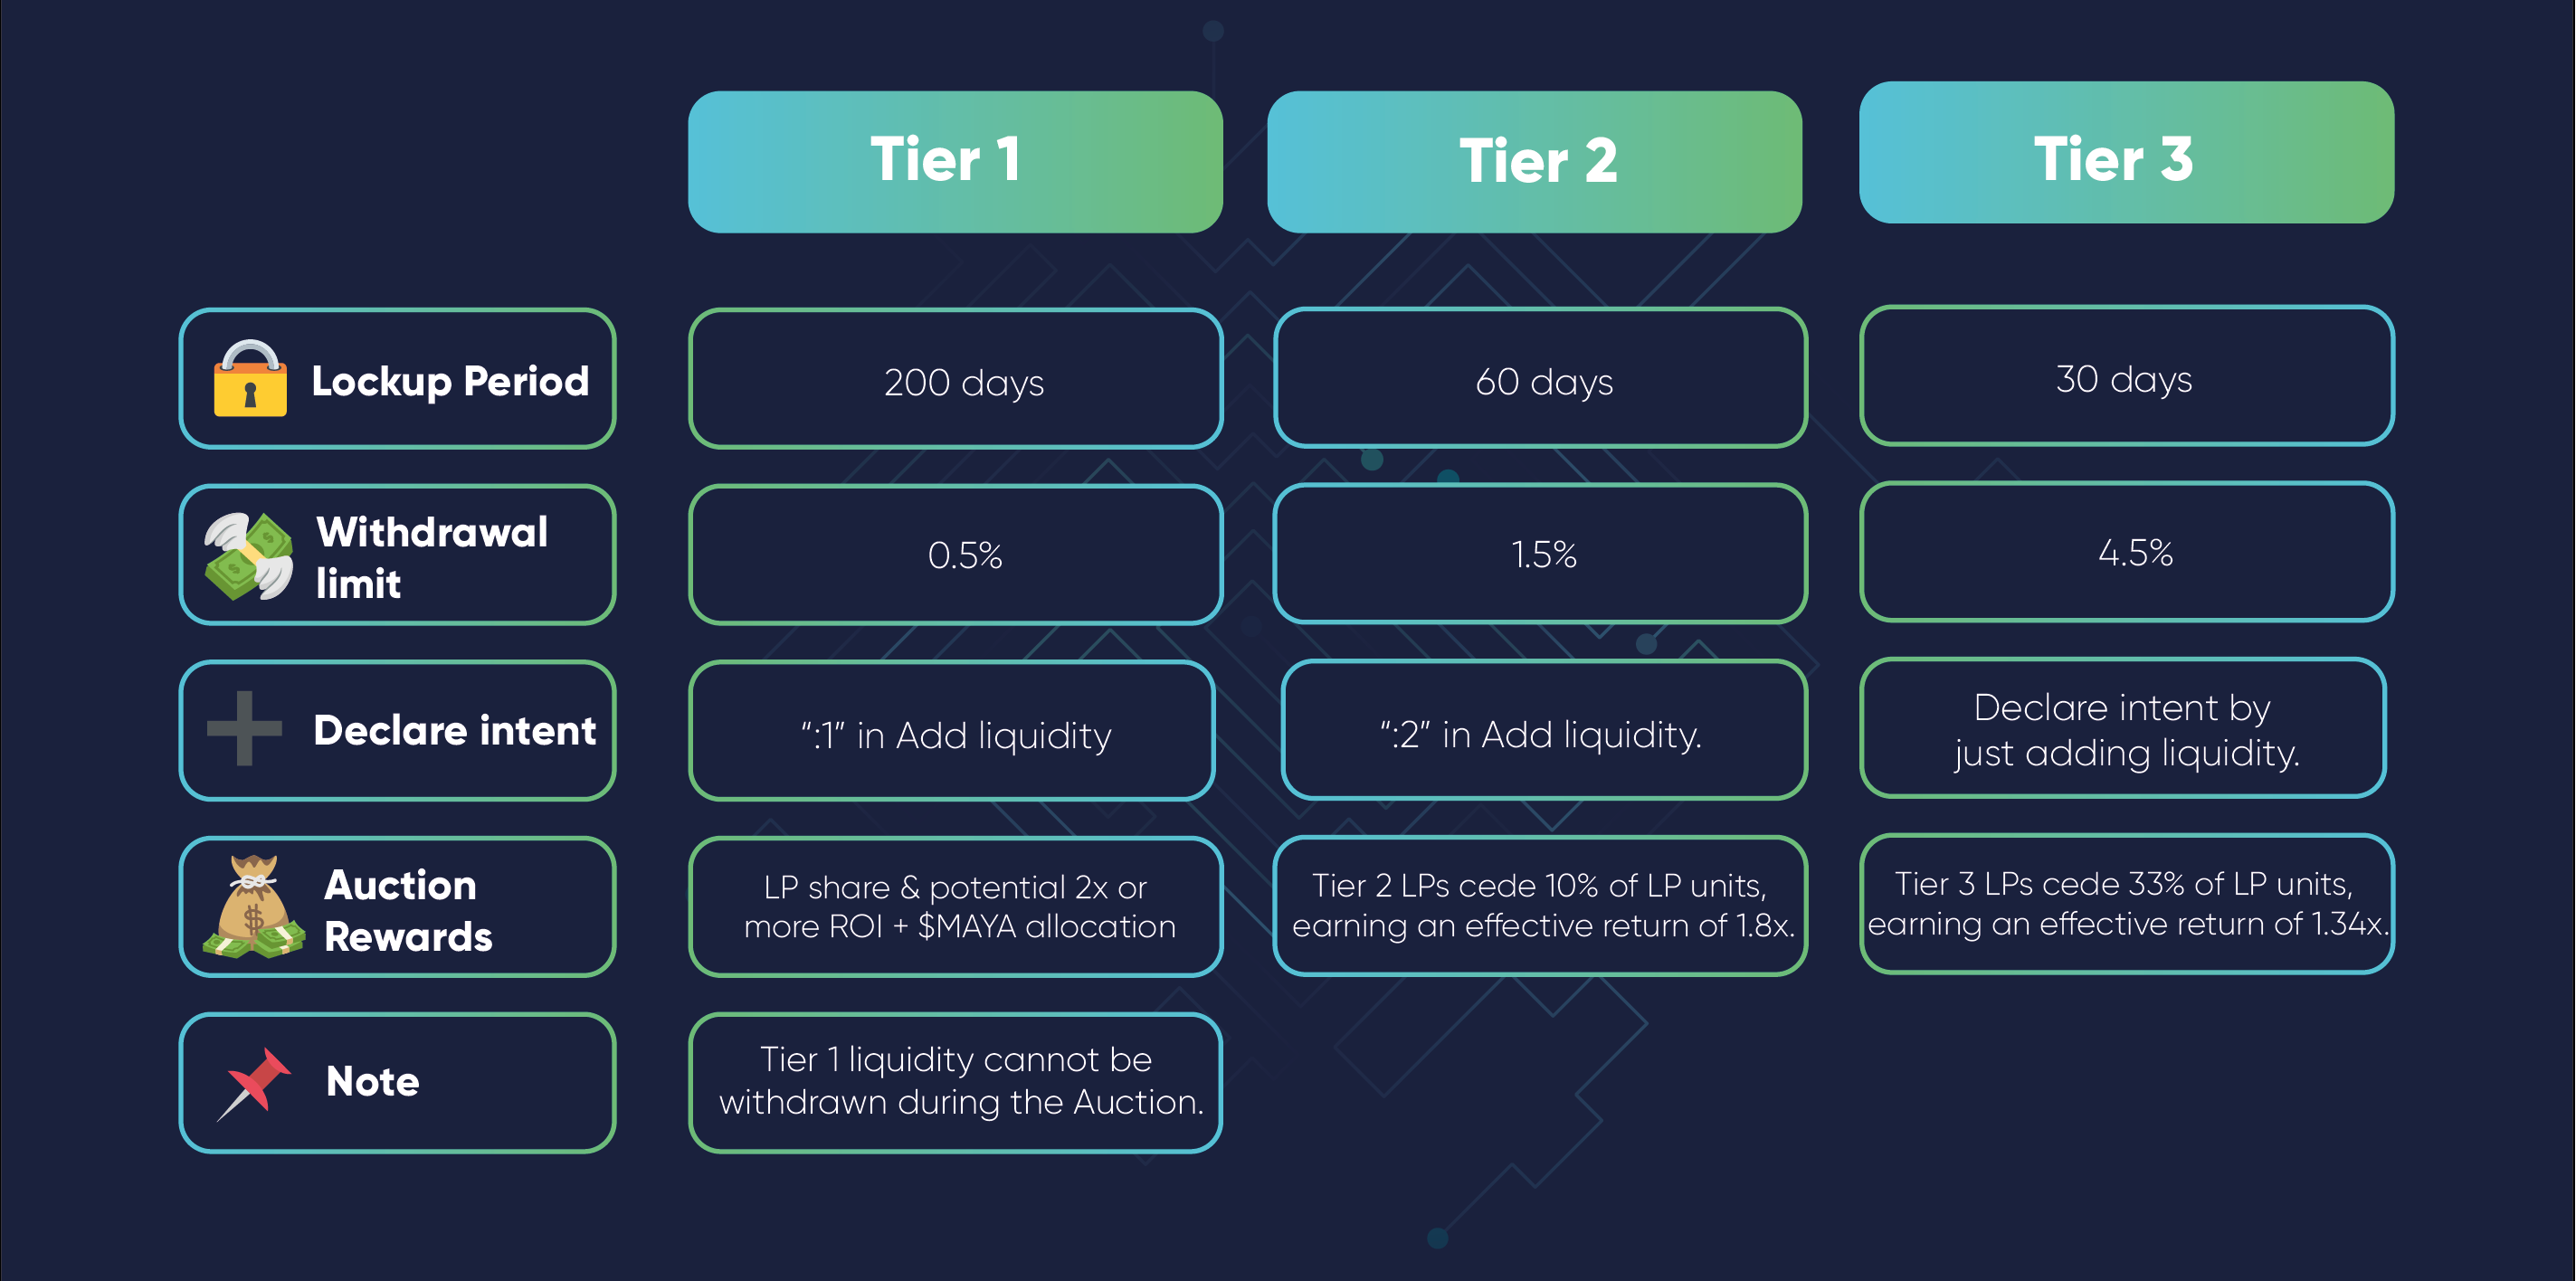
Our Withdrawals Tiers model is designed to prevent rapid withdrawals right after the $CACAO distribution and to give the protocol time to gain traction and reach stability. Liquidity providers with shorter-term investment horizons (Tiers 2 and 3) cede some of their $CACAO gains to those with longer timeframes (Tier 1).
The main differences between the 3 Tiers are their lockup periods and their expected returns, as described in the following image:

Choosing a Tier depends on your personal preferences and while we can't really pick one for you we can say that, overall, investing works better with longer-term focus. If you are an institutional investor, we do recommend going for a Tier 1 provision because your investment horizon is already long enough.
If you need another opinion, community member Kyle Krason created the following video, where he talks a little more about Tiers and their potential returns.
Once your assets are available and you have decided on your preferred Tier, here are the steps you should follow:
1. Download the ThorWallet application from either the App Store or Google Play. This should be pretty straightforward, but they also have a friendly "How to" guide if you want to use the Beta versions.

2. Create a wallet within the app or import one if you'd prefer. Their user interface guides you through both processes seamlessly, but they also have this Getting Started guide if you need help. If you do generate a new wallet, you will need to write down your new seed phrase somewhere safe. Remember, this is all non-custodial!

3. Explore the app and get used to it. You can send a small amount of crypto to your new addresses to ensure everything works fine.
4. Once ready, send your assets to their corresponding address. You can use their QR code representation if it is convenient. Click on any asset then you will find the "receive" button and the QR code will appear. Send only native BTC, ETH, RUNE and ERC-20 USDC or USDT; you can't provide wrapped or bridged tokens into Maya.

5. Tap on the Wallet icon on the bottom navigation menu, and select the Maya Liquidity Auction banner from those on the top.

6. Select your preferred asset from the list. Click continue.

7. Enter the amount you wish to provide to the Maya liquidity pools and select your Tier. Tier 3 is selected by default.

8. In the next screen, only if you are prompted, approve the necessary ERC-20 contract and wait for confirmation.

9. Click the Add Liquidity Now button to broadcast the transaction and await the proper confirmation. You are all set!

If you prefer video format, we have prepared two step-by-step videos for you:
Please note that our $MAYA token airdrop for $RUNE holders is not related or dependent on the $CACAO token distribution, which only our early liquidity providers get. You can read more about the former here.
We are working hard to ensure our launch is perfect, and we're sure the result will be worth it. If you still need more information, don't hesitate to contact us via our Discord Server or check the Maya Protocol documentation, where we regularly post our latest updates. We will be happy to talk to you!!


.webp)


